How to Generate a Full Blog Article with AI
Overview
The Article Generator turns a few keywords into a complete, ready-to-publish blog article - introduction, headings, body, and a conclusion - in a couple of minutes. It is built for marketers, founders, and content teams who want high-quality long-form content without staring at a blank page.
You stay in control the whole way: you choose the language, tone, and AI model, you can add your own title and context, and you can optionally have SmartlyQ research the top-ranking pages so the article is written to compete in search.
Where to find it
From the left sidebar, open Create > Generate Article (you can also click Generate Article from the Launchpad quick actions). You will land on the Article Generator setup screen.
Step 1 - Set the basics
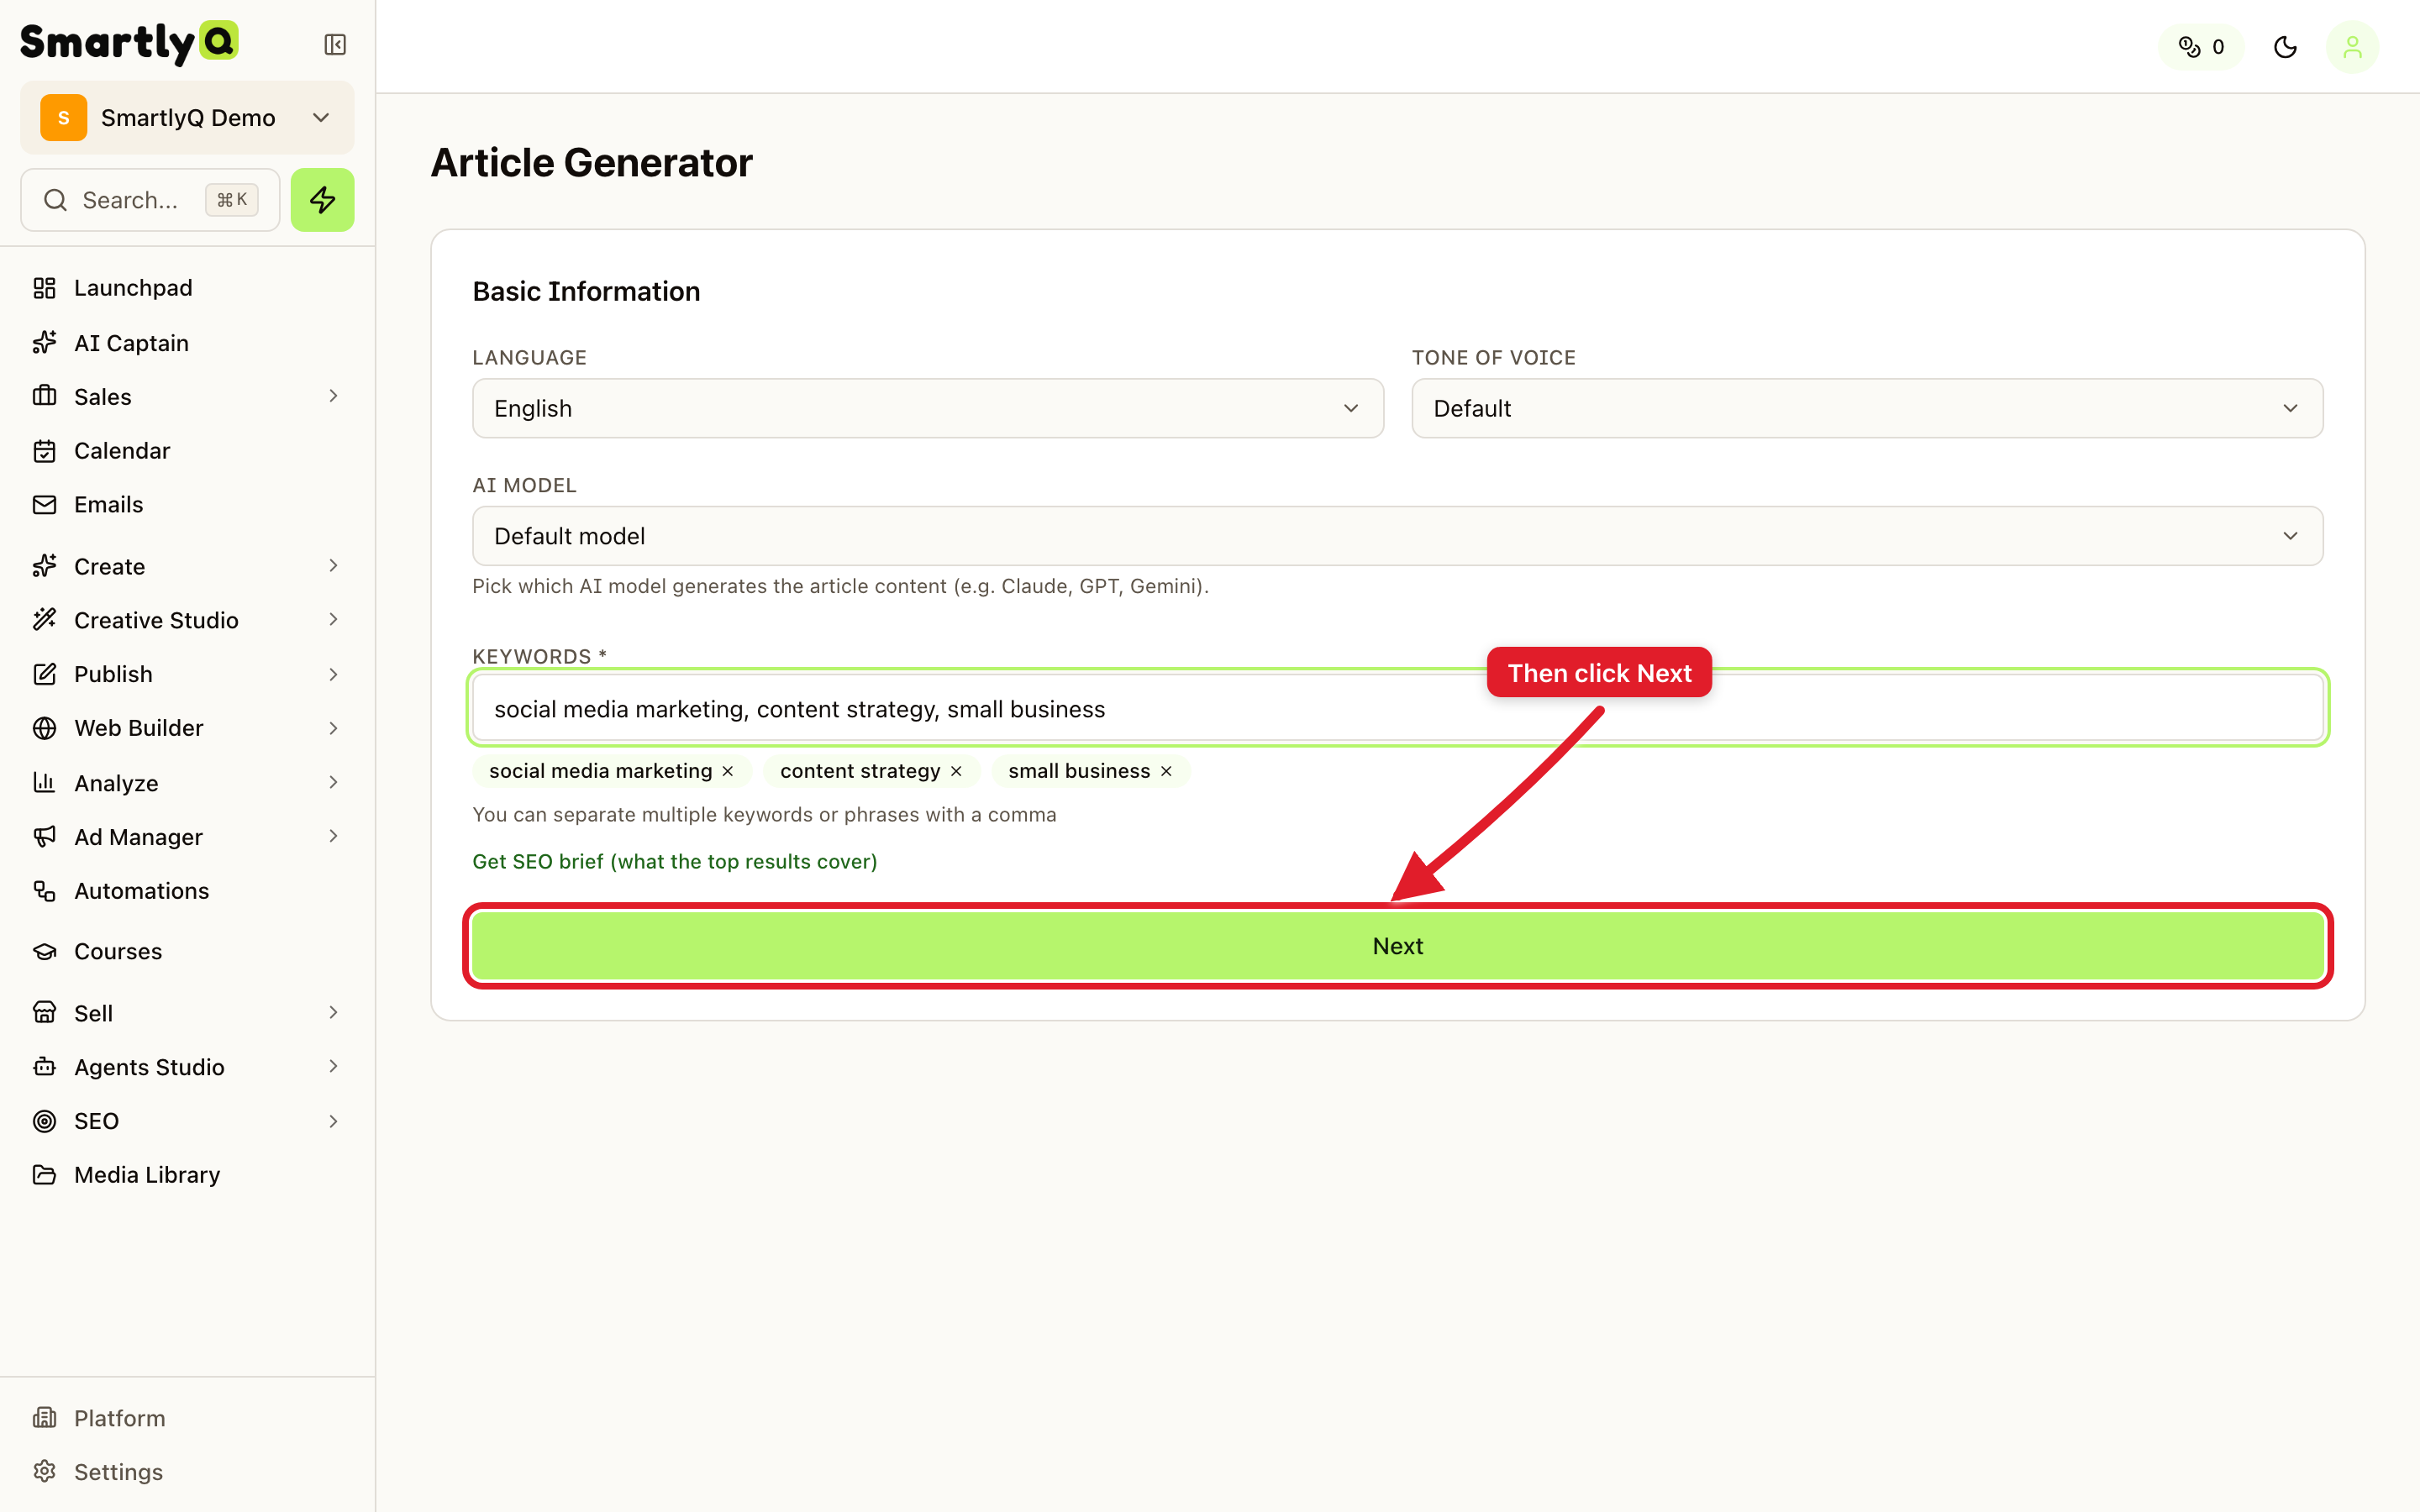
Fill in the Basic Information panel:
- Language - the language the article will be written in.
- Tone of voice - keep it Default, or match your brand (professional, casual, persuasive, and more).
- AI model - choose which model writes the article (for example Claude, GPT, or Gemini), or leave it on Default model to let SmartlyQ pick the best one for the job.
- Keywords - the topics the article should cover. Separate multiple keywords or phrases with a comma; each one becomes a tag.
When you are happy with the basics, click Next.
Step 2 - Title, context, and options
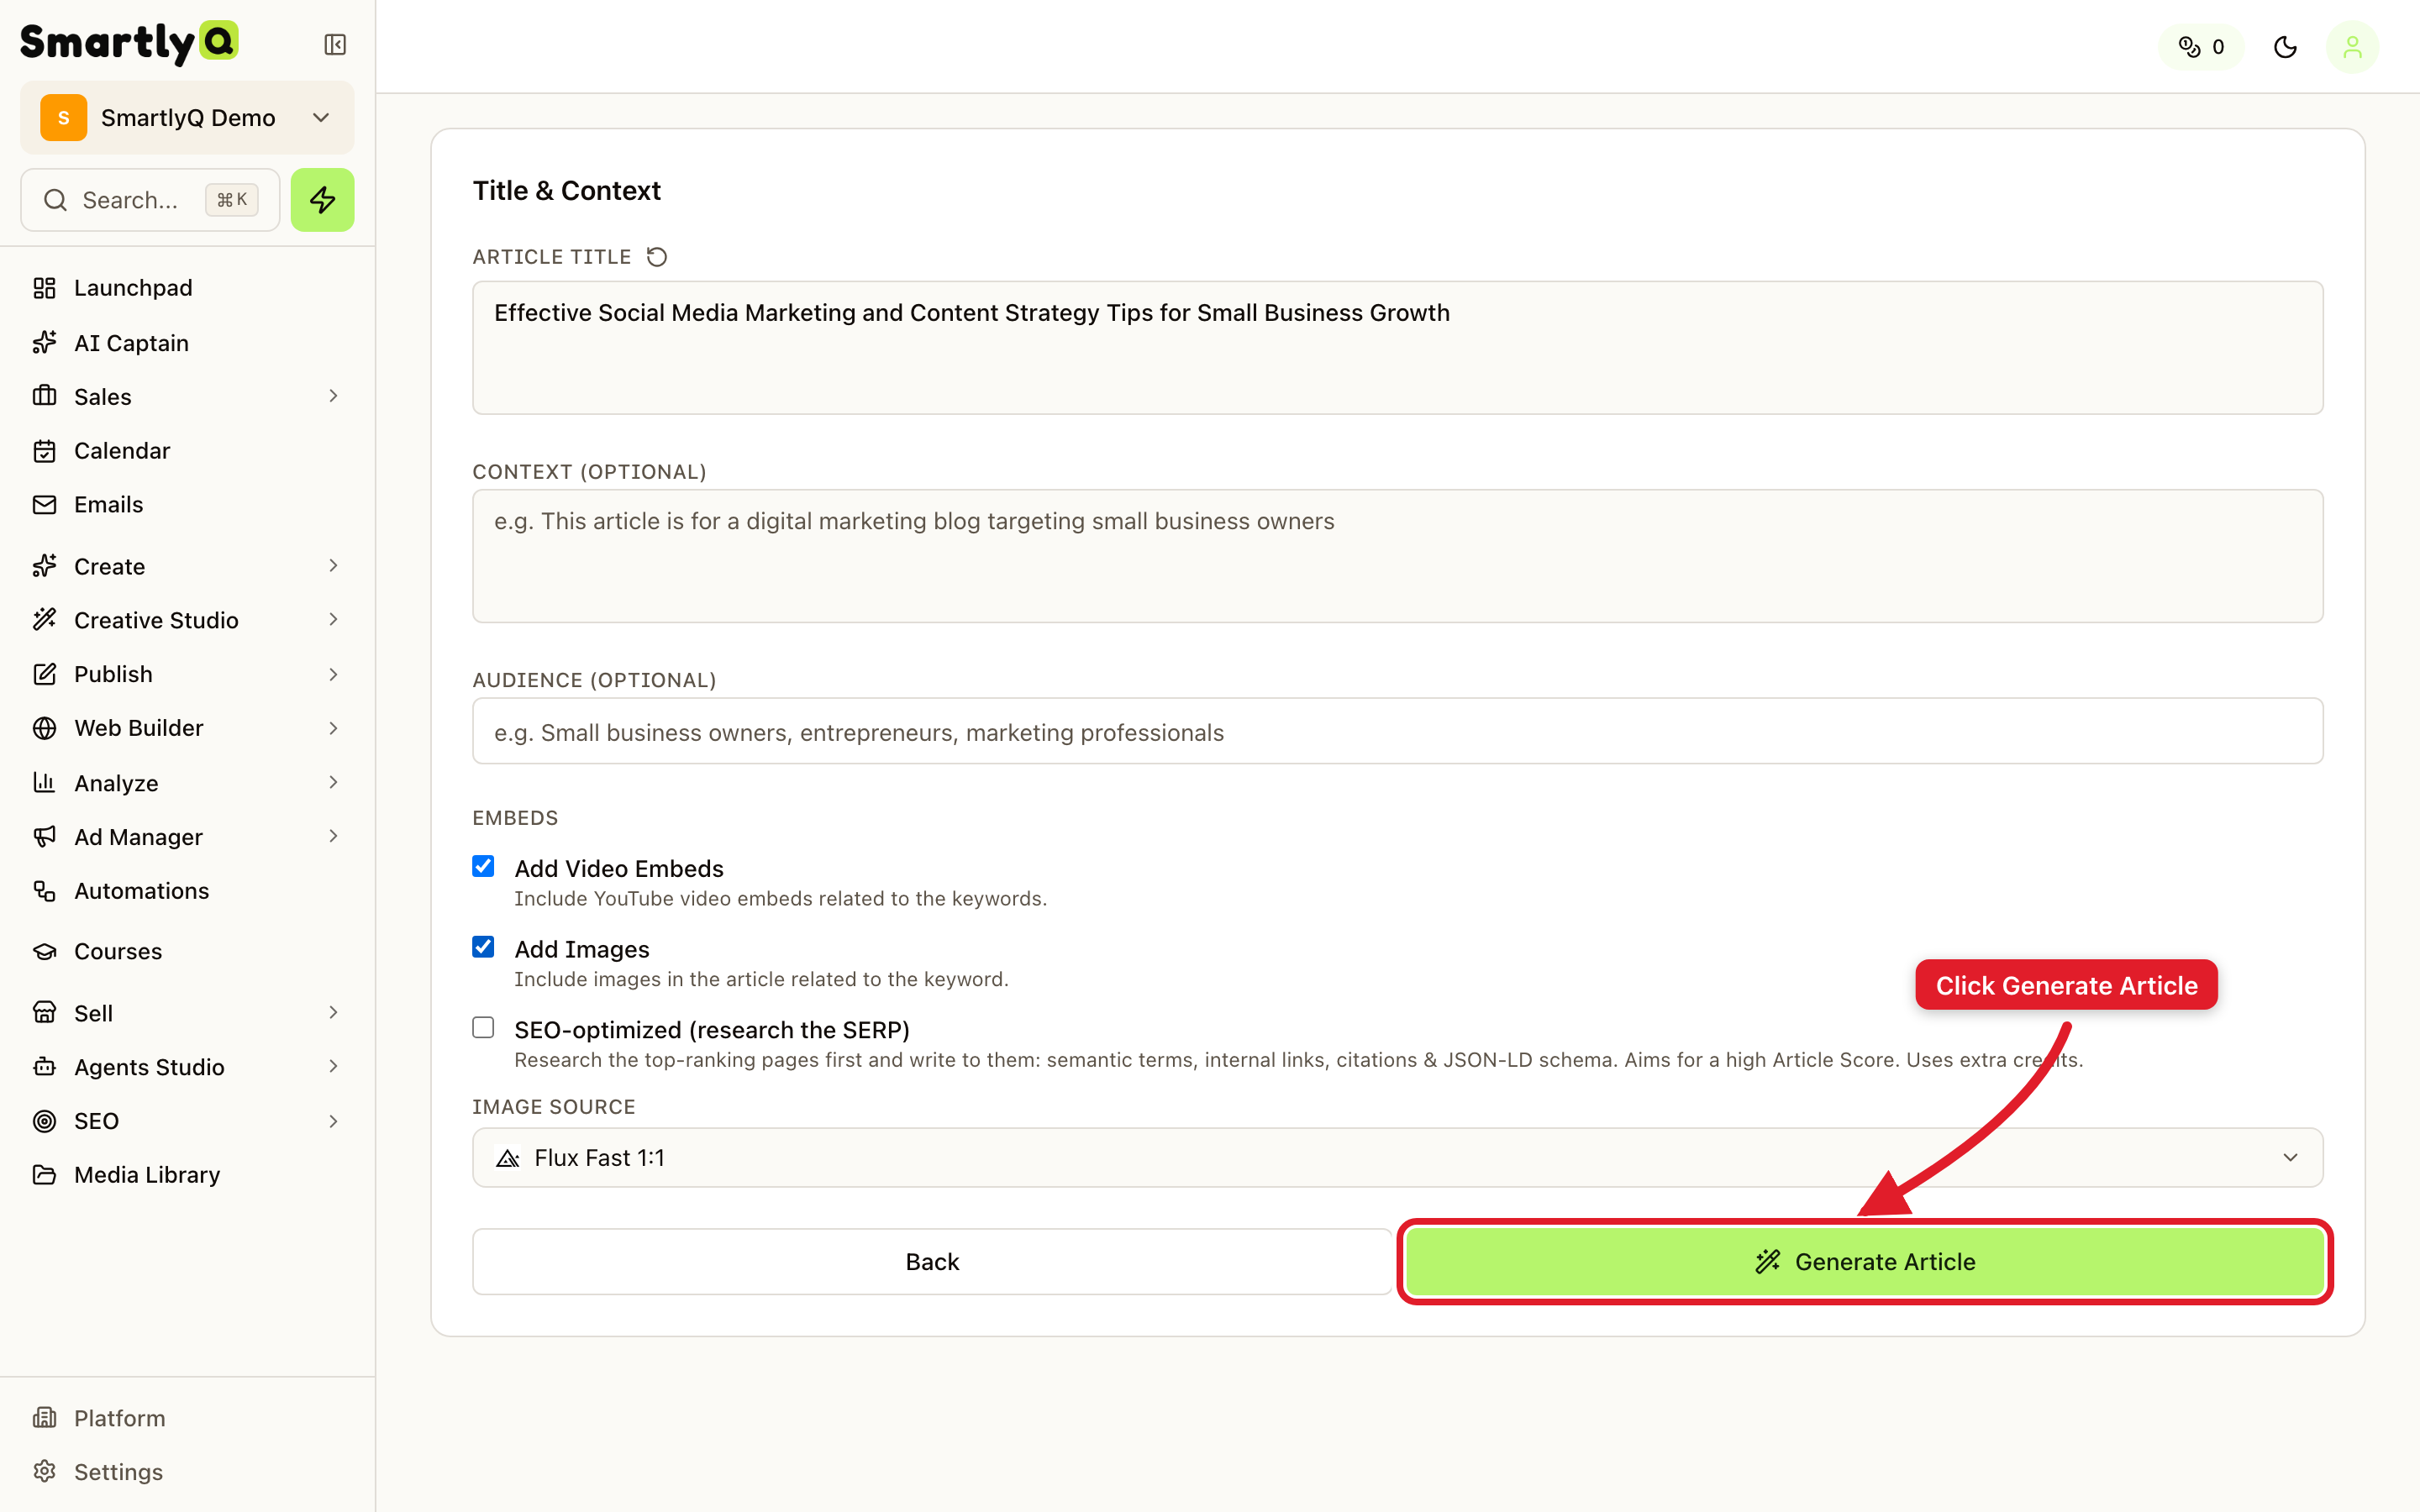
SmartlyQ automatically suggests an article title from your keywords. Keep it, edit it, or click the refresh icon to generate a new one. You can also add:
- Context (optional) - background about the article, such as the blog or product it is for.
- Audience (optional) - who you are writing for, so the tone and examples fit.
Below that you will find the enrichment options:
- Add Images - include relevant images inside the article.
- Add Video Embeds - embed related videos alongside the text.
- SEO-optimized (research the SERP) - SmartlyQ researches the top-ranking pages first, then writes to them: semantic terms, internal links, citations, and structured data. This aims for a high Article Score and uses extra credits.
Step 3 - Generate and edit
Click Generate Article. SmartlyQ writes the full draft and opens it in the built-in editor. From here you can:
- Edit any part of the text directly, just like a normal document.
- Restructure headings, add or remove sections, and refine the wording.
- Insert images and format the content to match your style.
- Export or publish the finished article.
Tips for the best results
- Be specific with keywords. "content strategy for dentists" produces a sharper article than "marketing".
- Add context and audience whenever you can - it noticeably improves relevance and tone.
- Turn on SEO-optimized when the goal is ranking in Google. It costs a few extra credits but researches the live search results and writes to them.
- Pick the model that fits. Default is a great starting point; switch models if you prefer a particular writing style.
That is it - from a handful of keywords to a polished, publish-ready article in minutes.